How to Froth Milk for Latte: Complete Guide (2025)
After training hundreds of baristas and making thousands of lattes, I've learned that perfect milk frothing is the difference between a good latte and an unforgettable one. The silky microfoam, the glossy texture, the way it pours for latte art. It looks like magic, but I promise you can master it at home with the right technique.
Whether you're using a professional espresso machine's steam wand or looking for ways to froth milk without any special equipment, this guide covers everything you need to know. I'll walk you through the exact techniques I use daily, the common mistakes that ruin milk texture, and the secrets that professional baristas use to create that cafe-quality microfoam every single time.
Understanding Milk Frothing: What Makes Perfect Microfoam
Before we dive into techniques, let's talk about what we're actually trying to achieve. Perfect latte milk isn't just "hot and foamy." It's a specific texture called microfoam, and it has three essential characteristics.
First, it's silky smooth with tiny, barely visible bubbles. When you look at the surface, it should have a glossy, wet paint-like sheen. Second, it should be sweet tasting, with milk's natural sugars brought forward by proper heating. Third, it needs to be the right consistency for pouring, flowing like warm honey rather than sitting stiff like shaving cream.
The science behind frothing is actually pretty fascinating. When you introduce air into milk and heat it simultaneously, milk proteins unfold and trap tiny air bubbles. The fat content provides stability and creaminess. Getting this balance right is what separates amateur foam from professional microfoam.
The Three Phases of Milk Frothing
The first 3-5 seconds where you introduce air into the milk. This is when you create the foam. Too little aeration gives you hot milk with no foam. Too much gives you stiff, bubbly foam that won't pour.
After aeration, you create a whirlpool motion that breaks down large bubbles into microfoam while continuing to heat the milk. This is where the magic happens.
After steaming, you tap and swirl the pitcher to pop any remaining surface bubbles and fully integrate the foam with the milk. This creates that glossy, pourable consistency.
Choosing the Best Milk for Frothing
Not all milk froths equally. I've tested every milk type you can imagine, and the differences are dramatic. Your choice of milk affects texture, stability, taste, and how easy it is to froth successfully.
Whole Milk (The Gold Standard)
Fat content: 3.25%
Frothing ease: Very easy
Texture: Creamy, silky, stable microfoam
Flavor: Sweet, rich, classic latte taste
This is what I recommend for beginners and what most cafes use. The fat content provides incredible creaminess while the protein creates stable foam. It's forgiving if your technique isn't perfect yet.
2% Milk (Lighter Alternative)
Fat content: 2%
Frothing ease: Easy
Texture: Light, foamy, slightly less stable
Flavor: Clean, less rich than whole milk
Great middle ground if you want to reduce fat but still get decent foam. It froths easily but won't be quite as creamy as whole milk. The foam dissipates a bit faster.
Oat Milk (Best Non-Dairy)
Fat content: Varies (2-3% in barista versions)
Frothing ease: Easy (barista versions)
Texture: Creamy, surprisingly similar to dairy
Flavor: Subtly sweet, oaty undertone
Use barista-specific oat milk brands like Oatly Barista or Minor Figures. Regular oat milk won't froth well. The barista versions are formulated with added fats and stabilizers that make them foam beautifully.
Skim Milk (Maximum Foam)
Fat content: 0-0.5%
Frothing ease: Easy but different
Texture: Very foamy, light, airy
Flavor: Thin, lacks richness
Creates tons of foam quickly, but it's stiff and dry rather than creamy. Without fat, you lose that silky mouthfeel. I only recommend this if you specifically want maximum foam volume with minimal calories.
Almond Milk (Challenging)
Fat content: 1-2%
Frothing ease: Difficult
Texture: Thin, unstable foam
Flavor: Nutty, distinct almond taste
Low protein content makes frothing tough. Even barista versions struggle to create stable microfoam. If you must use almond milk, look for barista-specific brands and accept that the texture won't be comparable to dairy or oat.
Soy Milk (Classic Alternative)
Fat content: 1.5-2%
Frothing ease: Moderate
Texture: Good foam when fresh
Flavor: Slightly beany, can be divisive
High protein content helps with frothing, but it can curdle in espresso if too hot or if the milk is old. Use fresh soy milk and don't overheat past 140°F for best results.
My Personal Recommendation
If you're learning to froth, start with whole milk. Once you can consistently make great microfoam with whole milk, then experiment with alternatives. For non-dairy, oat milk is your best bet. Just make sure it says "barista" or "barista edition" on the package.
How to Froth Milk with a Steam Wand (Professional Method)
The steam wand on an espresso machine is the professional tool for creating perfect microfoam. It's what baristas use worldwide, and once you master it, you'll make better lattes than most coffee shops. Here's my step-by-step process that I've refined over thousands of drinks.
Step 1: Prepare Your Equipment and Milk
Start with a clean, cold stainless steel pitcher. Size matters here. For a single latte (8-12oz drink), use a 12oz pitcher. For larger drinks or multiple lattes, use 20oz or 32oz. Fill the pitcher about halfway with cold milk straight from the refrigerator.
Why cold milk? It gives you more time to develop texture before reaching the final temperature. Room temperature milk heats too quickly, leaving you with hot milk before you can create proper microfoam.
Before you start, purge the steam wand by turning it on briefly to blow out any water condensation. Wipe it clean with a damp cloth. This prevents water from diluting your milk.
Step 2: Position the Steam Wand Correctly
This is where most beginners mess up. Place the steam wand tip just below the surface of the milk, about a quarter inch down. Position it slightly off-center, angled toward the side of the pitcher at about 45 degrees.
Hold the pitcher in one hand with your palm on the bottom so you can feel the temperature rising. This tactile feedback is crucial. With your other hand, hold the steam wand valve ready to turn on.
Step 3: The Aeration Phase (Stretching)
Turn the steam on full power immediately. Don't start slow. You should hear a gentle hissing or "paper tearing" sound. This is the sound of air being introduced into the milk.
Keep the wand tip just below the surface for 3-5 seconds. For a latte, aim for the shorter end (3-4 seconds). For a cappuccino, go longer (7-10 seconds). During this phase, you'll see the milk level rise as air incorporates.
If you hear loud splashing or see giant bubbles, the wand is too high. Lower it slightly. If you don't hear any hissing, it's too deep. Raise it until you hear that gentle hiss.
Step 4: The Texturing Phase (Rolling)
After 3-5 seconds of aeration, lower the steam wand tip deeper into the milk, about halfway down the pitcher. The hissing should stop and be replaced by a smoother sound.
If positioned correctly, the milk will start to roll in a whirlpool motion. This rolling action is essential because it breaks down any large bubbles created during aeration and creates that silky microfoam texture.
Keep the steam on and maintain this rolling motion while the milk heats. Watch the pitcher and feel the bottom with your palm. When the pitcher becomes too hot to hold comfortably (you'll want to pull your hand away), you've reached about 150°F. This takes about 20-30 seconds total from start.
If you have a thermometer, aim for 150-155°F (65-68°C). Never exceed 160°F or you'll scald the milk, creating a burnt taste and destroying the proteins.
Step 5: Shut Down and Polish
Turn off the steam and remove the wand from the milk. Don't remove the wand first or you'll spray milk everywhere. The order matters: steam off, then remove wand.
Immediately purge the steam wand again (quick blast) and wipe it clean. Milk residue becomes cement-hard if left on, ruining your machine and your next drink.
Now for the polishing step that many people skip. Tap the pitcher firmly on the counter 2-3 times to pop any larger surface bubbles. Then swirl the pitcher vigorously in a circular motion. The milk should look glossy and have the consistency of wet paint. No visible bubbles, just a smooth, shiny surface.
Keep swirling until you're ready to pour. If you wait too long, the foam will separate from the milk. Pour within 30 seconds of finishing steaming for best results.
The Perfect Microfoam Test
How do you know if you nailed it? Perfect microfoam should look like white paint. When you tilt the pitcher, it should flow smoothly rather than slosh. There should be no visible large bubbles on the surface. When you pour, the milk and foam should come out together, not foam first then milk. If you can do latte art, your microfoam is perfect. If not, you need to work on aeration and texturing.
How to Froth Milk Without a Frother (7 Methods That Actually Work)
Don't have a steam wand or electric frother? No problem. I've tested every method people claim works, and I'm going to share the ones that actually produce usable foam. These methods won't create microfoam quite like a steam wand, but they'll get you surprisingly close.
Method 1: The Jar Method (Best Overall)
What you need: A jar with a tight-fitting lid (mason jar works perfectly)
How to do it: Heat milk in the microwave or on the stove to about 150°F (until hot but not boiling). Pour milk into the jar, filling it no more than halfway. Seal the lid tightly. Shake vigorously for 30-60 seconds. You should hear the milk sloshing around and see foam forming through the glass.
Results: This creates surprisingly good foam with decent stability. The bubbles will be larger than professional microfoam, but for home use, it's excellent. The foam-to-milk ratio is similar to a latte.
Pro tip: After shaking, microwave the entire sealed jar for another 30 seconds. This stabilizes the foam and makes it creamier. Let it sit for 10 seconds, then open and pour.
Method 2: French Press Method (Most Similar to Professional)
What you need: A French press (any size works)
How to do it: Heat milk to 150°F. Pour hot milk into a clean French press, filling no more than halfway. Place the lid with plunger on top. Pump the plunger up and down rapidly for 30-45 seconds. You'll feel resistance as foam forms.
Results: This creates beautiful, stable foam that's remarkably close to steam wand results. The pumping action introduces air while the mesh screen breaks down bubbles. You can actually achieve latte art with this method if your technique is good.
Pro tip: Use whole milk for best results. Pump with smooth, deliberate strokes rather than violent thrashing. Consistency matters more than speed.
Method 3: Handheld Electric Frother (Convenient)
What you need: A battery-operated milk frother (costs $10-20)
How to do it: Heat milk to 150°F in a wide cup or small pitcher. Turn on the frother and hold it just below the milk surface at a slight angle. Move it around slightly to incorporate air for 30-45 seconds. You'll see foam developing on top.
Results: Creates decent foam quickly and easily. The foam tends to be a bit lighter and less dense than steam wand microfoam, but it's perfectly acceptable for home lattes.
Pro tip: Keep the whisk moving in a small circular pattern rather than holding it still. This helps break down larger bubbles as they form.
Method 4: Whisk Method (Old School)
What you need: A wire whisk and some elbow grease
How to do it: Heat milk in a small saucepan to 150°F. Using a whisk, beat the hot milk vigorously in a rapid back-and-forth or circular motion for 1-2 minutes. You need to go fast and create as much agitation as possible.
Results: This is exhausting but it works. You'll get foam, though it tends to be less stable and the bubbles are larger. Best for drinks you'll consume immediately.
Pro tip: Use a deep bowl or pot so you can really get aggressive without splashing everywhere. A wider whisk works better than a narrow one.
Method 5: Electric Mixer Method (Powerful)
What you need: A hand mixer or immersion blender
How to do it: Heat milk to 150°F in a tall container. Use the hand mixer or immersion blender on high speed for 30-45 seconds. Keep the beaters or blade near the surface to incorporate air.
Results: Creates a lot of foam quickly. The main downside is you can easily overmix and create too much foam with too-large bubbles. It's powerful but requires a light touch.
Pro tip: Use short bursts rather than continuous mixing. Stop when you see foam forming and check the texture. You can always add more but you can't remove foam.
Method 6: Automatic Milk Frother (Easiest)
What you need: An automatic milk frother machine ($30-100)
How to do it: Pour cold milk into the frother up to the max line. Press the button and wait. The machine heats and froths simultaneously. Takes 2-3 minutes.
Results: Extremely consistent and foolproof. The quality depends on the machine, but mid-range models ($50+) produce excellent microfoam comparable to manual methods. Zero skill required.
Pro tip: Clean it immediately after each use. Brands like Nespresso Aeroccino, Breville, and Miroco make reliable automatic frothers.
Method 7: Pump Frother (Manual but Effective)
What you need: A manual pump milk frother (looks like a French press with a fine mesh screen)
How to do it: Heat milk to 150°F. Pour into the frother. Pump the handle up and down rapidly for 30-60 seconds. The screen creates foam as you pump.
Results: Similar to the French press method but designed specifically for frothing. Creates good foam with decent stability. Requires manual effort but gives you more control than electric methods.
Pro tip: These work best with whole milk. Pump smoothly and consistently rather than erratically.
My Ranking for Methods Without a Frother
- Automatic milk frother - Most consistent, zero skill needed
- French press - Best manual results, closest to professional
- Jar method - Surprisingly good, requires no special equipment
- Handheld electric frother - Convenient and affordable
- Pump frother - Good results but requires effort
- Electric mixer - Powerful but easy to overdo
- Whisk method - Works but exhausting
Common Milk Frothing Mistakes (And How to Fix Them)
I've seen every possible milk frothing disaster in my years of training baristas. Here are the mistakes that ruin milk texture and how to avoid them.
Mistake 1: Starting with Warm Milk
The Problem: Room temperature or warm milk heats too quickly, reaching final temperature before you can create proper texture. You end up with hot milk and big bubbles.
The Fix: Always start with cold milk straight from the refrigerator. This gives you time to properly aerate and texture. Cold milk also holds smaller bubbles better during the stretching phase.
Mistake 2: Aerating Too Long
The Problem: Keeping the steam wand near the surface for too long (10+ seconds) creates a dry, stiff foam with large bubbles. It won't pour smoothly and ruins latte art.
The Fix: For lattes, limit aeration to 3-5 seconds. You should barely see the milk level rise. The goal is silky microfoam, not thick cappuccino foam. Less is more.
Mistake 3: Not Creating the Rolling Motion
The Problem: Holding the steam wand in the center of the pitcher or not angling it properly means no whirlpool forms. Without rolling action, large bubbles don't break down into microfoam.
The Fix: Position the steam wand off-center, angled toward the pitcher's side. The milk should roll in a circular motion. If it's not rolling, adjust the angle until you see the whirlpool effect.
Mistake 4: Overheating the Milk
The Problem: Heating milk above 160°F scalds it, creating a burnt taste and destroying the proteins that create stable foam. The milk becomes thin and the sweetness disappears.
The Fix: Target 150-155°F. Use the hand test: when the pitcher becomes uncomfortable to hold, you're at the right temperature. Invest in a thermometer if you consistently overheat. Better to be slightly cool than too hot.
Mistake 5: Using Too Much or Too Little Milk
The Problem: Overfilling the pitcher means milk overflows during frothing. Too little milk makes it impossible to create the rolling motion needed for texture.
The Fix: Fill the pitcher about halfway or slightly less. The milk will expand during frothing, so you need room. For a 12oz pitcher, use about 6-8oz of milk. This gives you enough for one latte with room to work.
Mistake 6: Skipping the Tap and Swirl
The Problem: Pouring immediately after steaming without tapping or swirling leaves large surface bubbles that ruin the pour. The foam and milk separate quickly.
The Fix: After steaming, tap the pitcher on the counter 2-3 times to pop surface bubbles. Then swirl vigorously in circles for 5-10 seconds. The milk should look glossy and flow like paint. Keep swirling until you're ready to pour.
Mistake 7: Using the Wrong Milk Type
The Problem: Using regular almond milk or old milk that's past its prime means you're fighting physics. Neither will froth properly no matter how good your technique.
The Fix: Use whole milk for learning. If you need non-dairy, buy barista-specific versions. Check expiration dates and use fresh milk. Your technique can only work with milk that has the right protein and fat content. For more on maintaining your equipment, check our complete guide.
Mistake 8: Dirty Equipment
The Problem: Milk residue on pitchers, steam wands, or frothers prevents proper frothing and adds off flavors. Old milk buildup is particularly problematic.
The Fix: Clean everything immediately after use. Rinse pitchers with hot water and wipe steam wands after every use. Do a thorough cleaning daily with appropriate cleaners. Never let milk dry on equipment.
Troubleshooting: Fixing Foam Problems
When your milk foam doesn't turn out right, use this guide to diagnose and fix the issue.
Problem: Large, Visible Bubbles
Causes:
- Steam wand too high above milk surface during aeration
- Not enough texturing time to break down bubbles
- Skipped the tapping and swirling step
- Aerating for too long
Solutions: Keep the steam wand barely below the surface, just enough to hear gentle hissing. Make sure you get a good rolling motion during texturing. Always tap and swirl after steaming. If problems persist, reduce aeration time.
Problem: No Foam at All
Causes:
- Steam wand too deep in the milk (no aeration)
- Not enough steam pressure
- Wrong type of milk (old or wrong formula)
- Milk was too warm to start
Solutions: Raise the steam wand closer to the surface during the first few seconds. Check that your espresso machine is fully heated. Use fresh, cold whole milk or barista oat milk. Make sure you're turning the steam on full power.
Problem: Foam Too Stiff/Dry
Causes:
- Aerated for too long (over-stretched)
- Using skim milk
- Not enough texturing phase
Solutions: Reduce aeration time to 3-4 seconds maximum for lattes. Switch to whole milk for creamier texture. Extend the texturing phase where the wand is deeper in the milk to create more liquid microfoam.
Problem: Foam Separates Quickly
Causes:
- Not enough aeration (too thin)
- Poor texturing creating uneven foam
- Milk overheated breaking down proteins
- Using milk with low protein content
Solutions: Increase aeration time slightly (add 1-2 seconds). Improve your rolling technique to better integrate foam. Don't heat past 155°F. Use whole milk or barista oat milk. Pour immediately after frothing.
Problem: Burnt or Scalded Taste
Causes:
- Overheating milk above 160°F
- Heating too quickly with insufficient steam control
- Old milk that's starting to turn
Solutions: Stop steaming earlier. Use the hand test: pull away when uncomfortable. Get a thermometer if you consistently overheat. Practice stopping at 150-155°F. Use fresh milk within a week of opening.
Problem: Inconsistent Results
Causes:
- Varying milk starting temperature
- Inconsistent aeration time
- Machine not fully warmed up
- Different amounts of milk each time
Solutions: Develop a consistent routine. Always use cold milk. Count seconds during aeration. Let your machine fully warm up (15-20 minutes). Use the same amount of milk each time by marking your pitcher. Consistency in process creates consistent results.
Milk Texture for Latte Art
If you want to create latte art, your milk texture needs to be absolutely perfect. Good latte art is 80% about the milk and only 20% about the pour. Here's what you need to know.
Requirements for Latte Art Milk
Zero visible bubbles. The surface should look like glossy white paint. When you tilt the pitcher, it should flow smoothly in one motion rather than the foam sitting on top of the milk.
150-155°F is ideal. Too cold and the milk won't flow properly. Too hot and it becomes thin and loses viscosity needed for latte art contrast.
The milk should be slightly thicker than cream but thinner than melted ice cream. It needs to have body and weight when you pour. If it pours like water, you don't have enough foam. If it gloops out, you have too much.
The foam must be fully integrated with the milk, not sitting as a separate layer. This comes from proper texturing and thorough swirling. When you pour, foam and milk should come out together.
To test if your milk is latte art ready, do the "pour test." Pour a small amount into a cup. It should come out in one smooth, continuous stream. If foam comes out first, then liquid, or if you see bubbles, your milk isn't ready. Go back and practice your texturing technique.
The most common issue preventing latte art is under-texturing. People get the aeration right but don't spend enough time creating the rolling motion that integrates everything. Aim for at least 20 seconds of rolling time while heating.
Milk Frothing for Different Coffee Drinks
Different coffee drinks require different milk textures. Here's how to adjust your frothing technique for each style.
Latte
- Aeration time: 3-5 seconds
- Texture: Silky microfoam, very smooth
- Foam-to-milk ratio: Mostly steamed milk with thin layer of microfoam (1:3)
- Final result: Glossy, pourable, perfect for latte art
- Temperature: 150-155°F
Cappuccino
- Aeration time: 8-10 seconds
- Texture: Thicker, airier foam with more body
- Foam-to-milk ratio: Equal parts espresso, milk, and foam (1:1:1)
- Final result: Thick foam cap that holds shape
- Temperature: 150-160°F
Flat White
- Aeration time: 2-3 seconds (minimal)
- Texture: Very velvety, almost no visible foam
- Foam-to-milk ratio: Mostly milk with just a hint of microfoam
- Final result: Smooth, velvety, strong coffee flavor
- Temperature: 140-150°F (served slightly cooler)
Macchiato
- Aeration time: 10-12 seconds
- Texture: Dry, stiff foam
- Foam-to-milk ratio: Just foam, minimal liquid milk
- Final result: Small dollop of thick foam on espresso
- Temperature: 150-160°F
Cortado
- Aeration time: 2-3 seconds
- Texture: Mostly steamed milk, minimal foam
- Foam-to-milk ratio: 1:1 espresso to milk with thin foam layer
- Final result: Balanced, smooth, coffee-forward
- Temperature: 140-150°F
Frequently Asked Questions
How do you froth milk for a latte?
To froth milk for a latte, start with cold milk in a pitcher. Using a steam wand, position the tip just below the surface and turn on the steam. Keep it there for 3-5 seconds to aerate (stretching phase), then lower the wand deeper to create a rolling motion while heating to 150-155°F. The result should be silky microfoam with a glossy, paint-like texture perfect for latte art.
How can I froth milk without a frother?
You can froth milk without a frother using several methods: (1) Jar method - shake hot milk vigorously in a sealed jar for 30-60 seconds, (2) French press - pump the plunger up and down rapidly in hot milk for 30 seconds, (3) Whisk method - vigorously whisk hot milk in a circular motion for 1-2 minutes, or (4) Electric mixer - use a hand mixer on high speed in hot milk for 30-45 seconds. The jar and French press methods work best for creating foam at home.
What is the best milk for frothing?
Whole milk (3.25% fat) is the best milk for frothing because it creates the most stable, creamy microfoam with a sweet flavor. The combination of fat and protein creates ideal texture and stability. For alternatives, oat milk froths excellently and is the top non-dairy choice. 2% milk also works well with slightly lighter texture. Skim milk creates more foam but lacks creaminess, while almond milk is challenging to froth due to low protein content.
What temperature should milk be for a latte?
The ideal temperature for latte milk is 150-155°F (65-68°C). This temperature creates the best texture and sweetness without scalding the milk. Above 160°F, milk proteins break down and the milk develops a burnt taste. Below 140°F, the foam won't be stable enough. You can judge temperature by touch: when the pitcher becomes uncomfortable to hold, the milk is ready. A thermometer ensures precision for beginners.
Why is my milk not frothing properly?
Common reasons milk won't froth properly include: (1) Milk is too warm - always start with cold milk, (2) Wrong milk type - skim milk or some plant milks don't froth well, (3) Not enough aeration - keep the steam wand near the surface longer during the stretching phase, (4) Dirty equipment - milk residue prevents proper frothing, or (5) Old milk - use fresh milk for best results. Whole milk and barista-blend oat milk froth most reliably.
How do you make microfoam for latte art?
To make microfoam for latte art: (1) Start with cold whole milk in a pitcher, (2) Aerate for only 3-5 seconds by keeping the steam wand just below the surface - you should hear a gentle hissing, not loud splashing, (3) Immediately lower the wand to create a rolling whirlpool motion, (4) Heat to 150-155°F, (5) Tap the pitcher to pop surface bubbles and swirl vigorously. Perfect microfoam should look like wet paint with a glossy sheen and no visible bubbles.
Can you froth cold milk for iced lattes?
Yes, you can froth cold milk for iced lattes, though the foam won't be as stable as hot frothed milk. Use a handheld frother, French press, or jar method with cold milk straight from the refrigerator. Froth for 30-60 seconds until foamy. The foam will be lighter and less dense than hot microfoam, but it works well for iced drinks. Whole milk and oat milk froth best when cold. Pour immediately over ice and espresso as cold foam dissipates faster.
What's the difference between latte foam and cappuccino foam?
Latte foam is smooth microfoam with tiny, barely visible bubbles that creates a silky texture and glossy surface - ideal for latte art. You aerate for only 3-5 seconds. Cappuccino foam is thicker, drier, and airier with more volume. You aerate for 8-10 seconds to create more foam that sits on top of the drink. Lattes have a 1:3 ratio of foam to steamed milk, while cappuccinos have equal parts espresso, steamed milk, and foam.
Final Thoughts: Practice Makes Perfect Foam
Learning to froth milk properly is one of those skills that seems impossible at first, then suddenly clicks. I've trained countless baristas, and the moment it clicks for them is always magical. Their eyes light up when they see that glossy microfoam for the first time.
My advice? Don't get discouraged by your first attempts. Even professional baristas made terrible foam when they started. I remember my early days creating bubbles the size of quarters and thinking I'd never get it right. But muscle memory develops faster than you think.
Focus on getting consistent results with one method before trying others. If you have a steam wand, master that first. If not, pick the French press or jar method and practice until you can do it without thinking. Understanding the science helps, but ultimately it's about feeling when the milk is right.
The beauty of perfect microfoam isn't just aesthetic. It transforms the entire latte experience. The silky texture, the way it carries the coffee's flavor, the creamy mouthfeel. Once you can consistently create great foam, you'll never want to go back to basic coffee. For learning more about making exceptional coffee at home, check out our guide to coffee extraction.
Keep practicing, stay patient with yourself, and enjoy the journey. Every latte is an opportunity to improve. Before you know it, you'll be making cafe-quality drinks that impress everyone who tries them. Happy frothing!
Related Articles
Top 10 Best Coffee Machines for 2025→
A comprehensive guide to the best coffee machines for every budget and need. Compare features, prices, and find the perfect machine for your home.
Breville Barista Express vs Pro: Which Should You Buy?→
A detailed comparison of the Breville Barista Express and Pro espresso machines. Explore features, performance, and value to find the best fit for your coffee needs.
Breville vs De'Longhi: Which Makes Better Espresso?→
A comprehensive comparison of Breville and De'Longhi espresso machines. Explore features, performance, and find the best fit for your coffee needs.
10 Best Espresso Machines Under $500 (2025 Guide)→
Expert reviews of the best espresso machines under $500, find your perfect machine with real testing results.
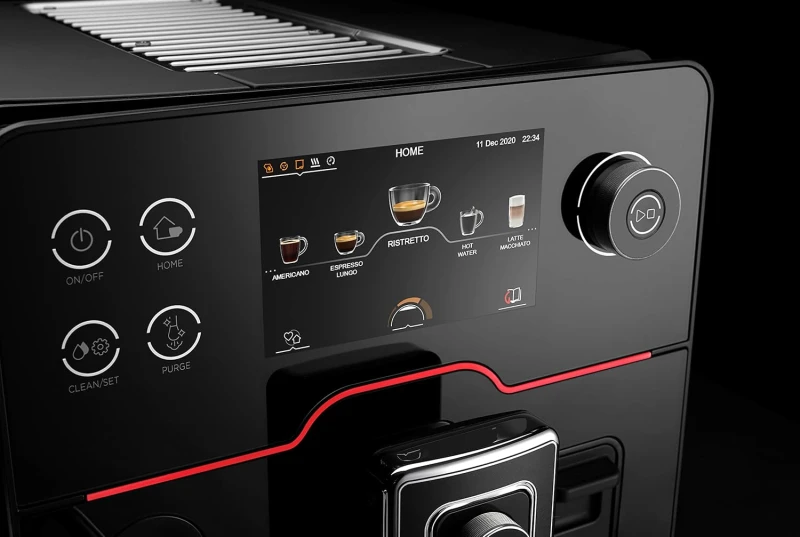
Breville vs Gaggia: Which Espresso Machine is Right for You?→
A detailed comparison of Breville and Gaggia espresso machines. Explore features, performance, and value to find the best fit for your coffee needs.

Nespresso vs Keurig: Which Pod System is Best?→
A comprehensive comparison of Nespresso and Keurig pod coffee systems. Explore features, coffee quality, and find the best fit for your lifestyle.

James Wilson
Coffee Expert & Product Reviewer
James has been reviewing coffee equipment for over a decade, helping thousands of coffee lovers find their perfect brew.